
How To Blend Images in Photoshop (The 9 Steps Easy Beginner Way)
How to Blend Images in Photoshop
Do you struggle to Blend Images in Photoshop? Below are nine straightforward steps to combine images in photoshop. However, this will work for both focus and exposure stacking, combining multiple photos to achieve the perfect picture. As a result, using this technique, I've captured unique images displayed in my portfolio images.
You can watch a video here, where I explain how to capture this out in the field!
9 Simple Steps to Blend Multiple Images Together
Step 1: Import both images into photoshop
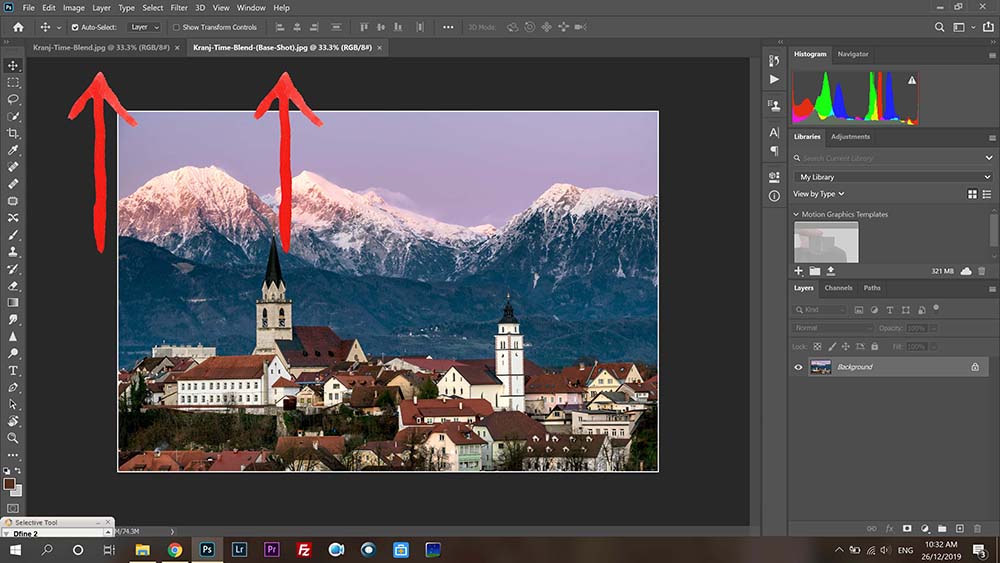
Step 2: Place the images together on the same window; this can be done by:
- Select all (Control + A)
- Copy image (Control + C)
- Close page (Control + W)
- Paste Image (Control + V)
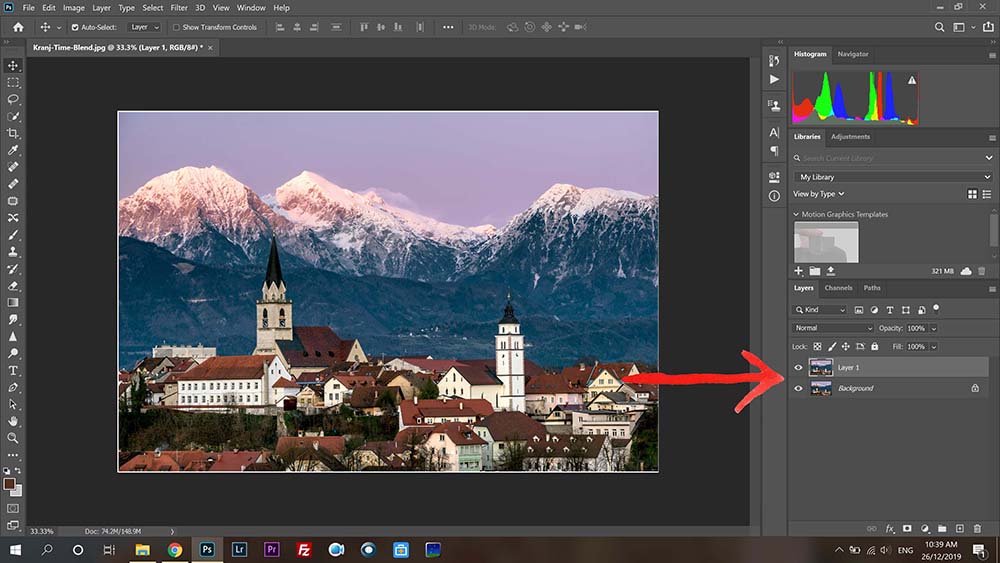
Step 3: Click the padlock on the right-hand side. As a result, this will unlock the image and allow us to edit the image.

Step 3a: POWER TIP - Rename the images to foreground & background. (or whatever suits the photos) The reason behind this is, it'll help separate the changes, especially when focus stacking. The differences are minimal; therefore, this will help immensely.
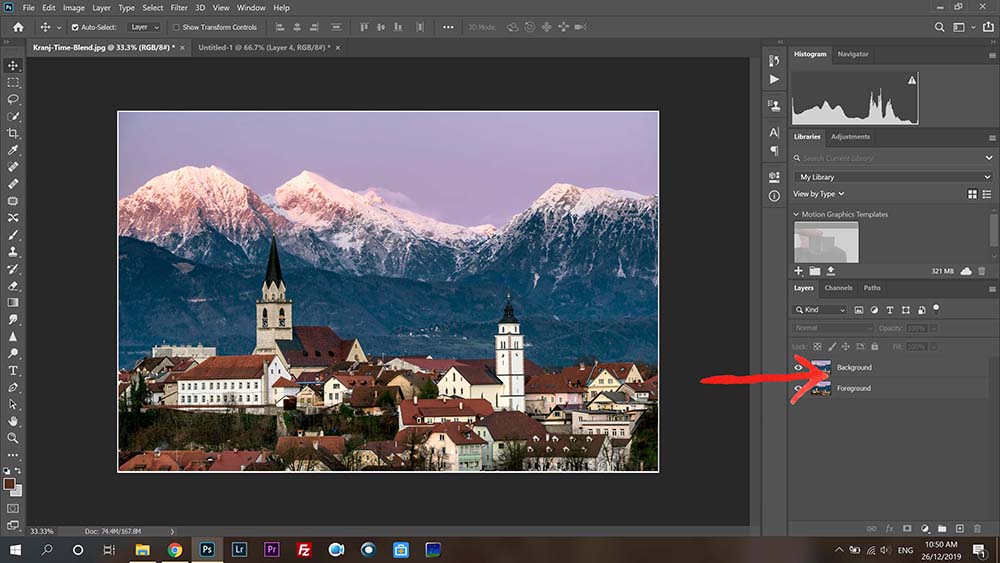
Step 4: Now both images are unlocked, select them both by clicking on one, hold shift and connect the other image (or images)

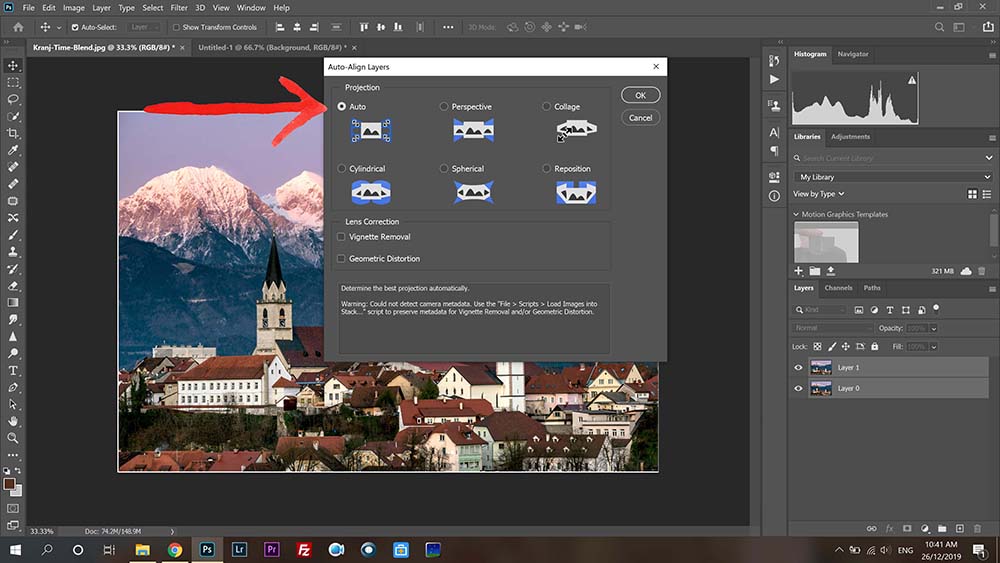
Step 5: Aligning the photos - this is extremely important! Further down the process, if missed, the pictures will not line up.
Start by doing:
- Click Edit (Top panel)
- Auto-Align Layers (make sure ALL images are selected)
- Projection: Auto
- Click Ok
Finally, the panel (as per the picture in the PDF file below) you'll leave to auto—99% of the time. This work perfectly to align the images.
DOWNLOAD THE PDF FILE BELOW TO FOLLOW ALONG WITH IMAGES!
Step 6: Adding a layer mask. On the right-hand side, click once on the icon that looks like the Japanese flag. (Add layer Mask - as per image in PDF file)
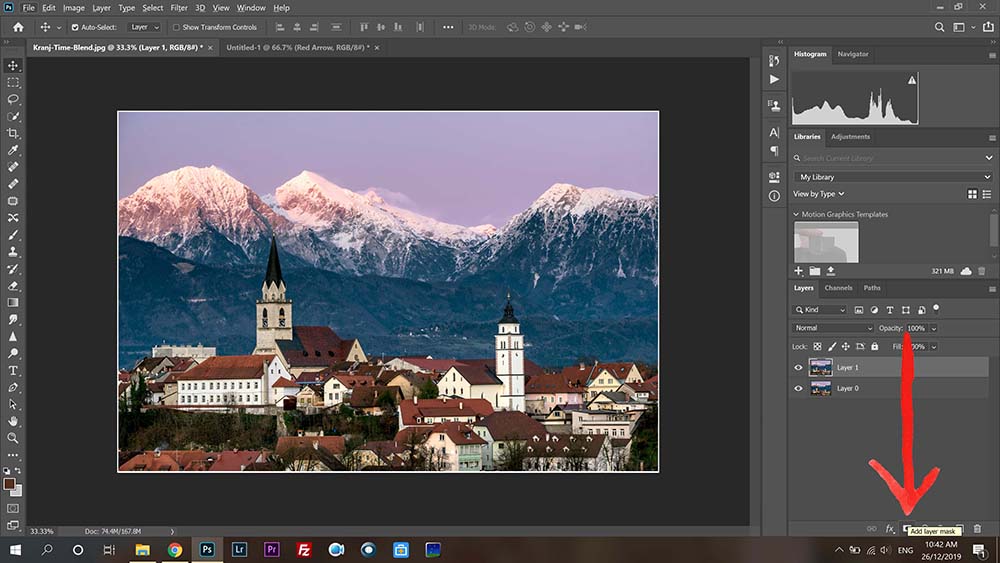
Step 7: A white tab will appear next to the layers (I always choose the top layer - If you've named the photos, such as background, this will improve your workflow.)
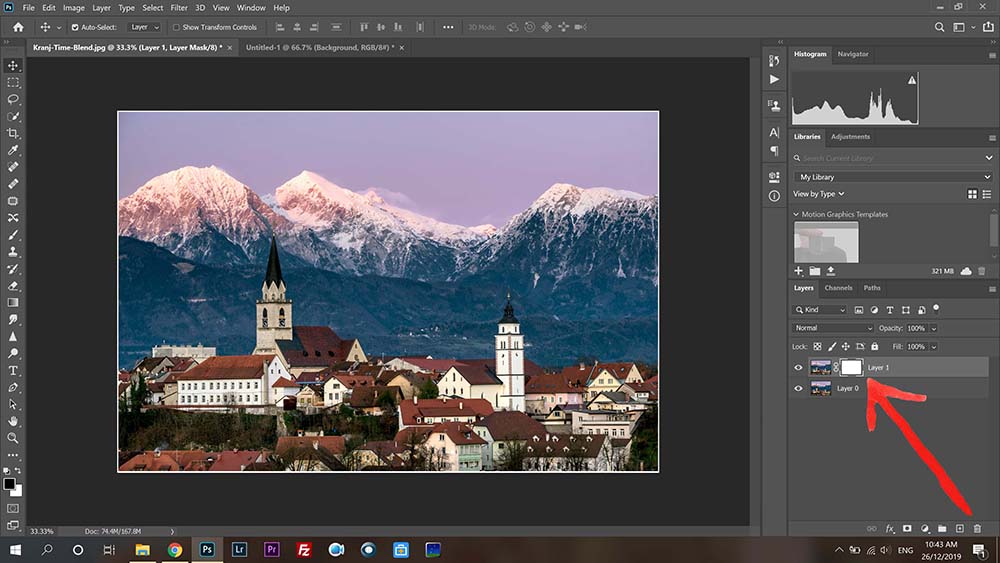
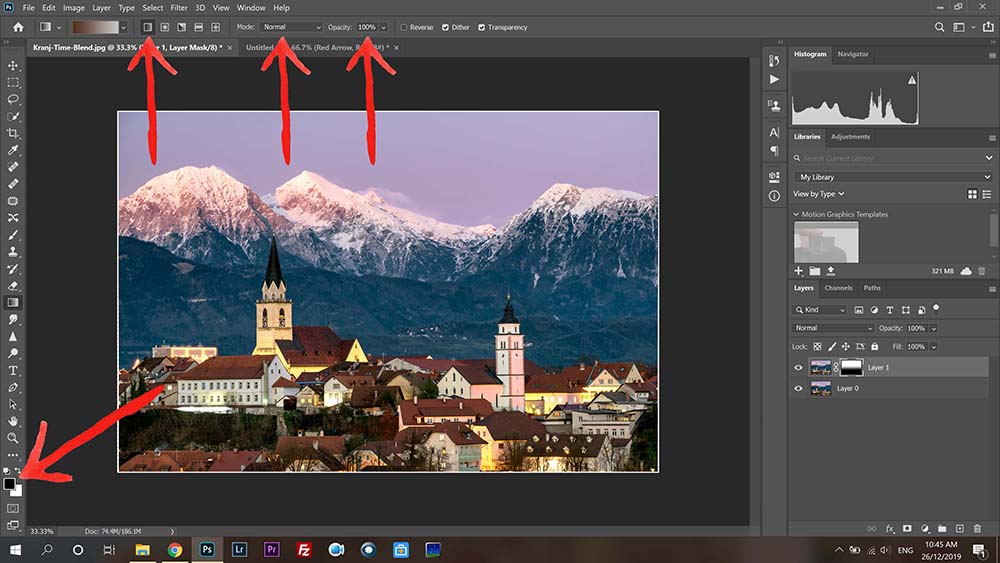
Step 8: With the layer mask added, we will implement a gradient mask to apply the changes selectively.
Start by applying a gradient mask on the left-hand panel (see the image in PDF) or push 'G' on the keyboard to access the gradient mask.
On the image, find a starting point for our exposure or focus stacking area to begin.
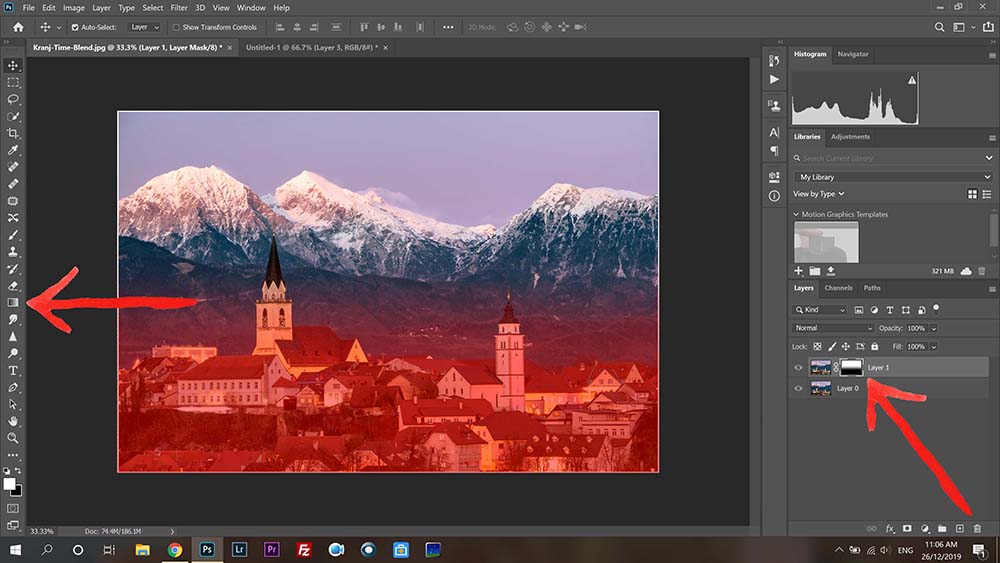
This desired point will be where the gradient mask starts at 100%. Moving up or down on the image will change the gradient to 0%.
TIPS:
- Holding down the shift key while applying the gradient mask makes it work in 90 degrees alterations.
- Pressing the '' on the keyboard will use a red mask overlay on the image to show where the gradient is applied. (As per image)
- Zoom up to 100% and check the blend, don't be afraid to try this multiple times.
Stage 9: If this doesn't work correctly on your computer, make sure the settings are the same as the image provided in the PDF file. (set to default)
Enjoy & Keep Shooting!